Words of Wisdom
Adding words to your rugs

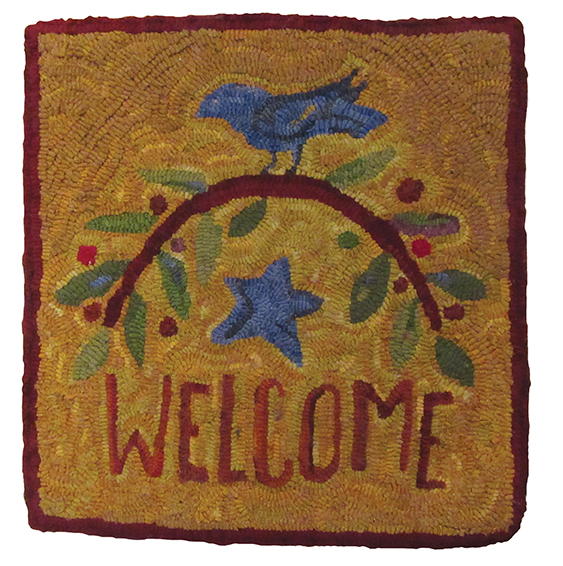
A Bluebird’s Welcome, 20" x 20", #4-, 6-, and 8-cut wool on linen. Designed and hooked by Ellen Banker, Williamsburg, Virginia, 2017.
Many hookers can’t imagine using a technique that requires hooking, unhooking, and rehooking. But it is really easy and really worth it for some rugs. (And some hookers say it is worth it for all rugs!)
Here’s how it works: Suppose you are hooking your rug in a #8 cut. First, using scrap wool (such as a really obnoxious bright color so you cannot miss it), hook the words in a #5 cut. Then, hook your #8-cut background, in your planned color, around all the words. These #5-cut words are your placeholders.
Now, it’s time to unhook. Pull the words out, one letter at a time. This is critical.
To rehook: Use a #8-cut strip or even a #8.5-cut strip (just slightly larger than your cut for the rug) and rehook the letter. You’ll notice how the wool fills in the gaps of your placeholder space and lays nicely within the background. Your letters will retain the structure of the original type.
I like to call the rehooked words the Final Words. (That’s a little rug-hooker humor.)
With straightforward designs, where you are going to hook one row of wool for each letter, just go ahead and hook the letters. One hint is to hook a couple of letters at a time and fill the background in around them as you go. This makes it less likely that you’ll accidently pull out an individual loop for a letter that you just hooked—while also giving the piece a bit of stability. Plus, it ensures you have at least one row of hooked wool between your letters.
Another hint is to hook the letters slightly higher than you normally hook the background. They will stand out just a little more, but it won’t be really obvious.
Do you have any final words that need to be hooked? Here is a simple design with a word to practice your new-found skills!
Read NextHook Your Own House


